One honest hourSetup week
Do these once, in order, from the Command Center (usefieldforge.com/console). Each unlocks the ones after it:
- Price book (20 min, the highest-leverage 20 minutes you’ll spend). You start with a trade template; go through it and make the prices yours. Already have a book? Parts Book › Import price book brings in the CSV from Profit Rhino, your old software or Excel in one shot; mark it flat-rate and the voice AI bills those tasks all-inclusive, never adding labor on top. Add your cost per part too, which unlocks real profit numbers. Every voice invoice, estimate and PO prices from this book. That’s how three different techs quote the same job the same way.
- Company settings (10 min). Settings tab: hourly rate, tax rule, delivery method (text or email), timezone, logo.
- Card payments (5 min). Settings › Payments & Money › connect Stripe (a standard identity check). From then on every invoice carries a Pay button. Money lands in your Stripe account; FieldForge’s 1% platform fee is the whole story.
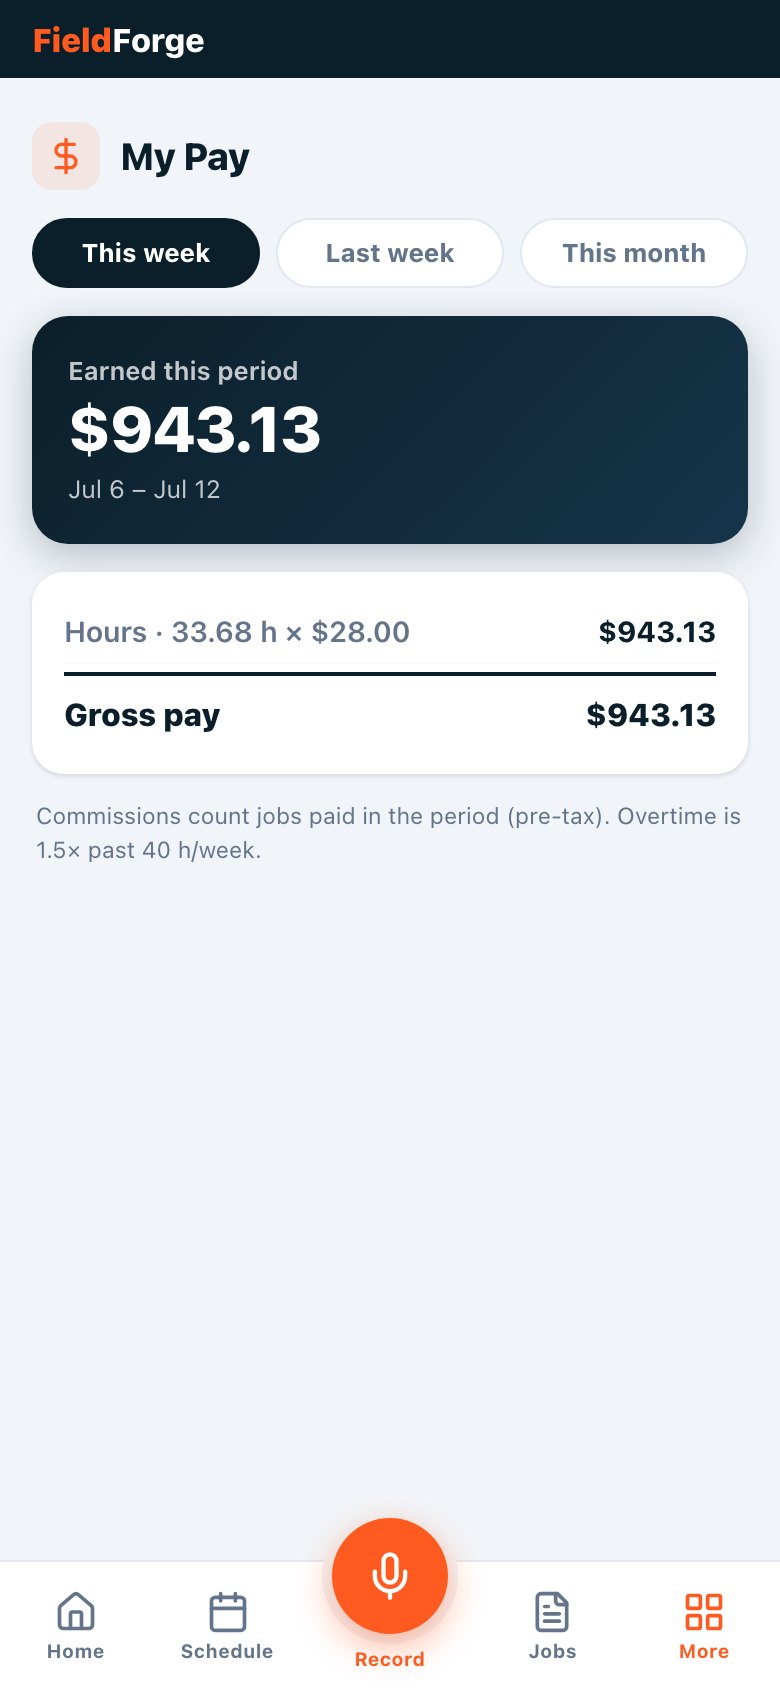
- Add the crew (5 min). Team tab › add each person with their name and phone number. That phone number IS their login: they open usefieldforge.com/app, enter it, and a text code signs them in. Set each person’s comp profile while you’re there (hourly, salary, % of sales or profit, spiffs, any mix). This powers their My Pay screen and your payroll run.
- Flip on your automations (10 min). Reviews, payment reminders, deposits, follow-ups, appointment reminders, late fees, financing, memberships. Each is one card in Settings. Start with reviews plus payment reminders; add the rest as they fit. Every one is explained below.
- Import your customers (2 min). Customers › Import CSV. Any export from a spreadsheet or your old platform works; duplicates skip themselves.
Coffee-lengthYour daily two minutes
- 7 AM: the report finds you. Your daily text: what’s unpaid and aging. Read it with coffee; do nothing yet.
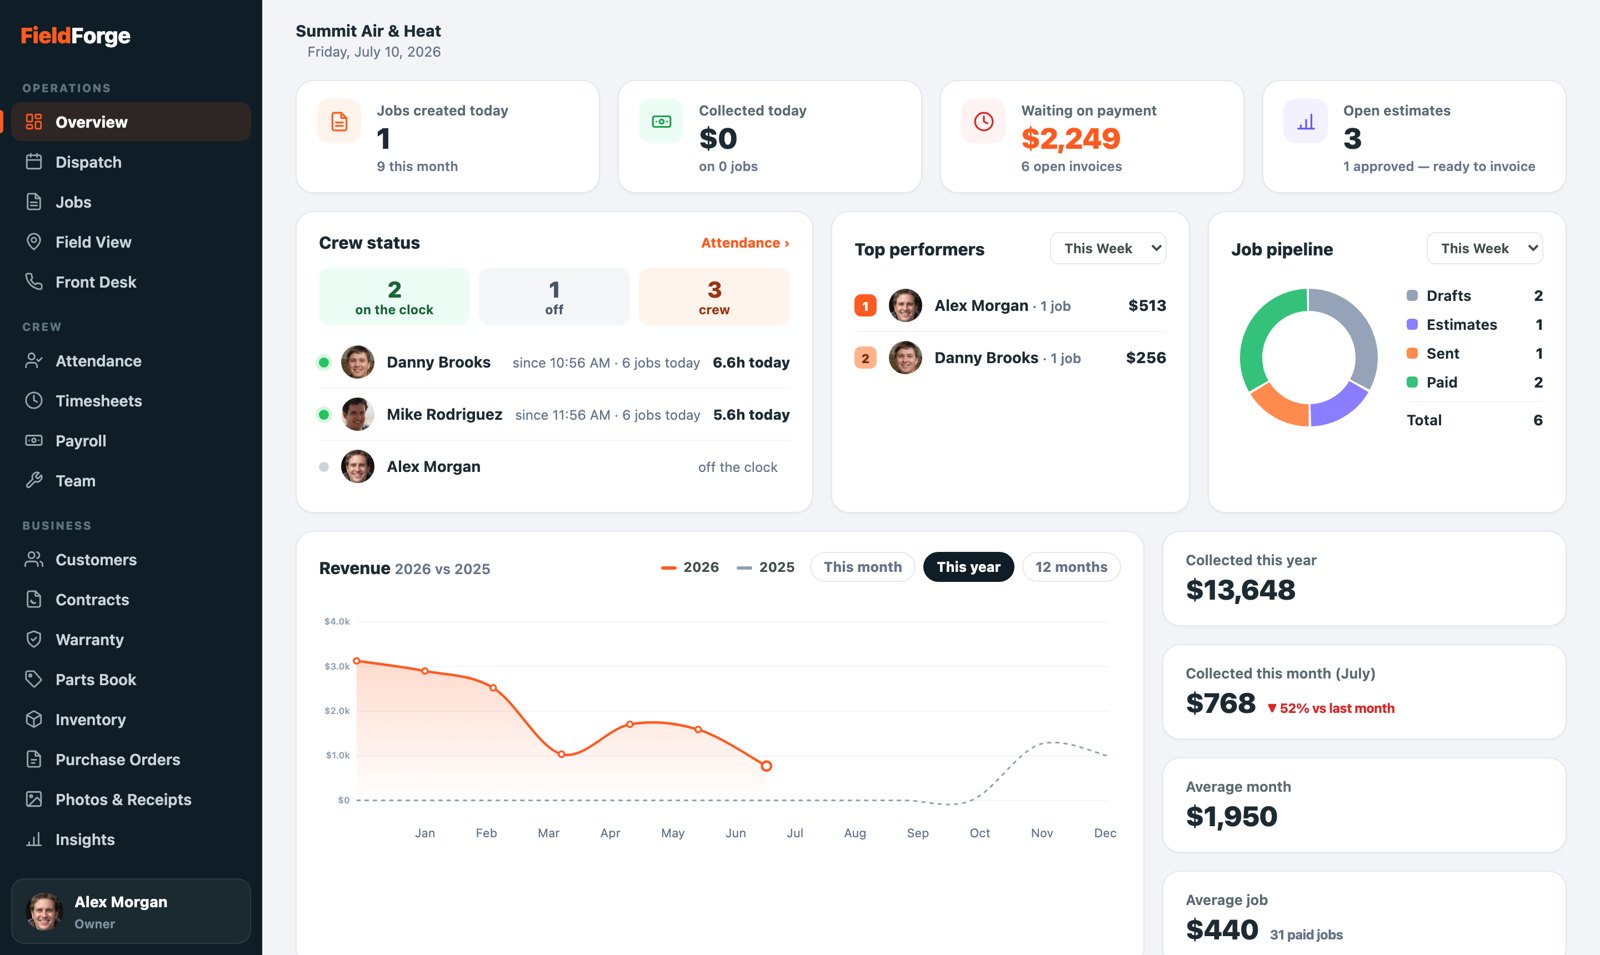
- Overview tab (60 seconds): money today, who’s on the clock, the pipeline. Red or amber anything? Click it.
- Bookings to confirm: new requests (from Front Desk or online) wait in Dispatch. Confirm each onto a tech’s day; FieldForge recommends who fits by distance and load. Same-day assignments notify the tech automatically.
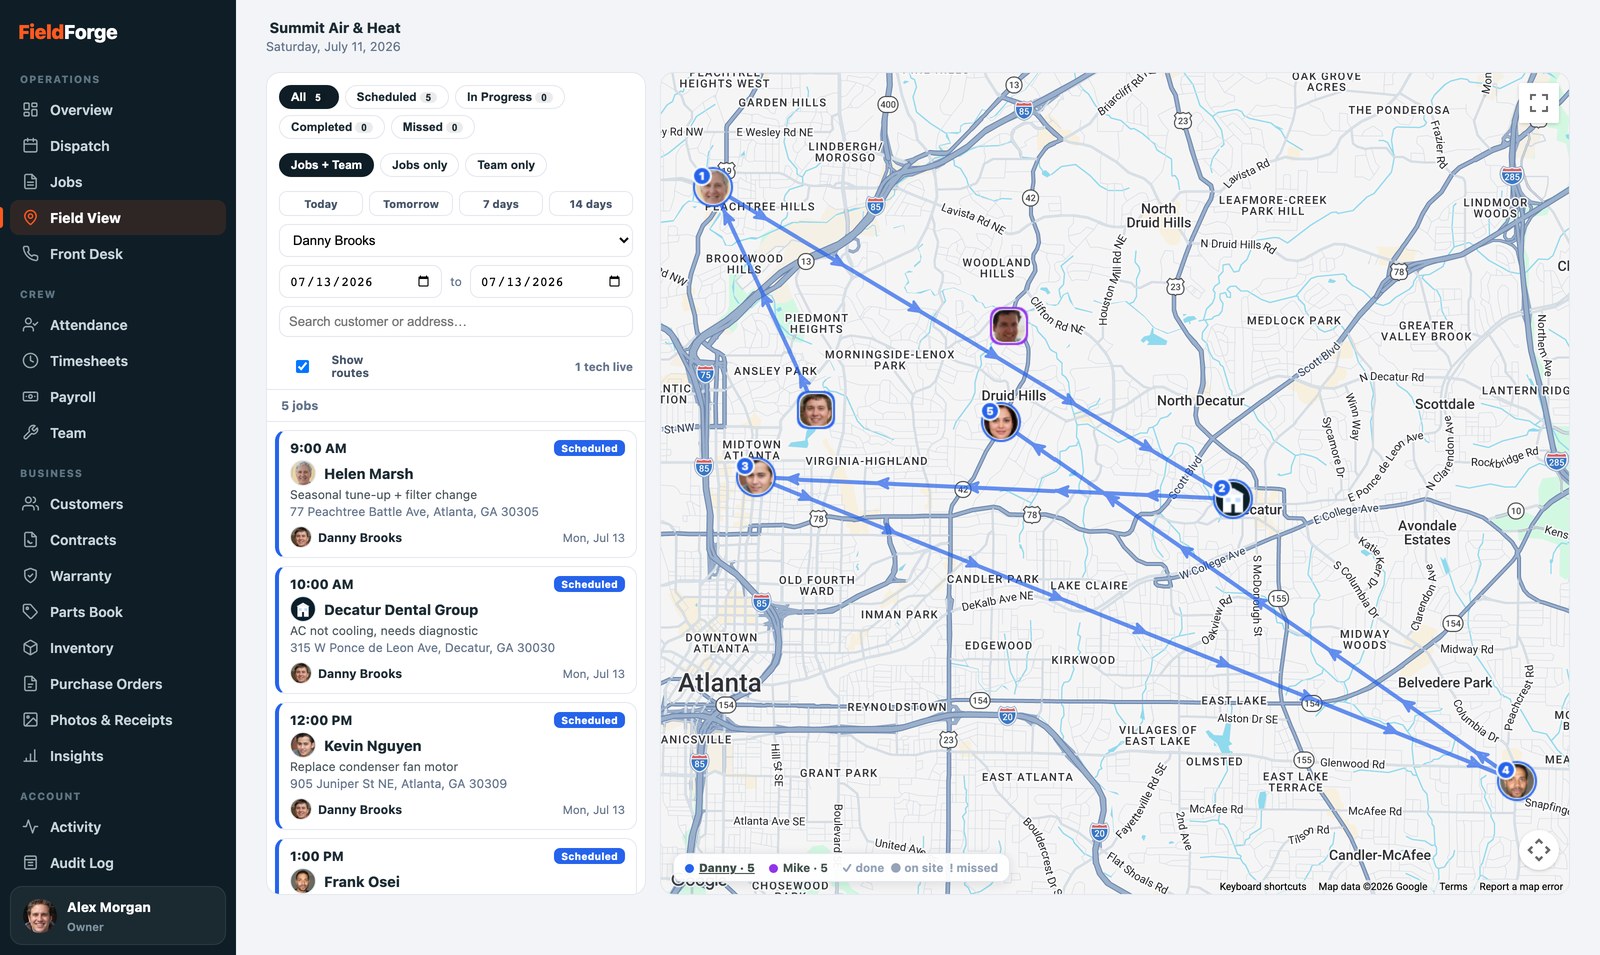
- Field View when you wonder “where is everyone?” Every job is pinned with the customer’s face in its tech’s color, numbered in visit order; trucks show live positions, refreshed every 30 seconds. Click a name in the legend to trace one tech’s route, or click any pin to reassign to whoever’s closest and free.
Reach the crew instantlyNotifications: message the whole team
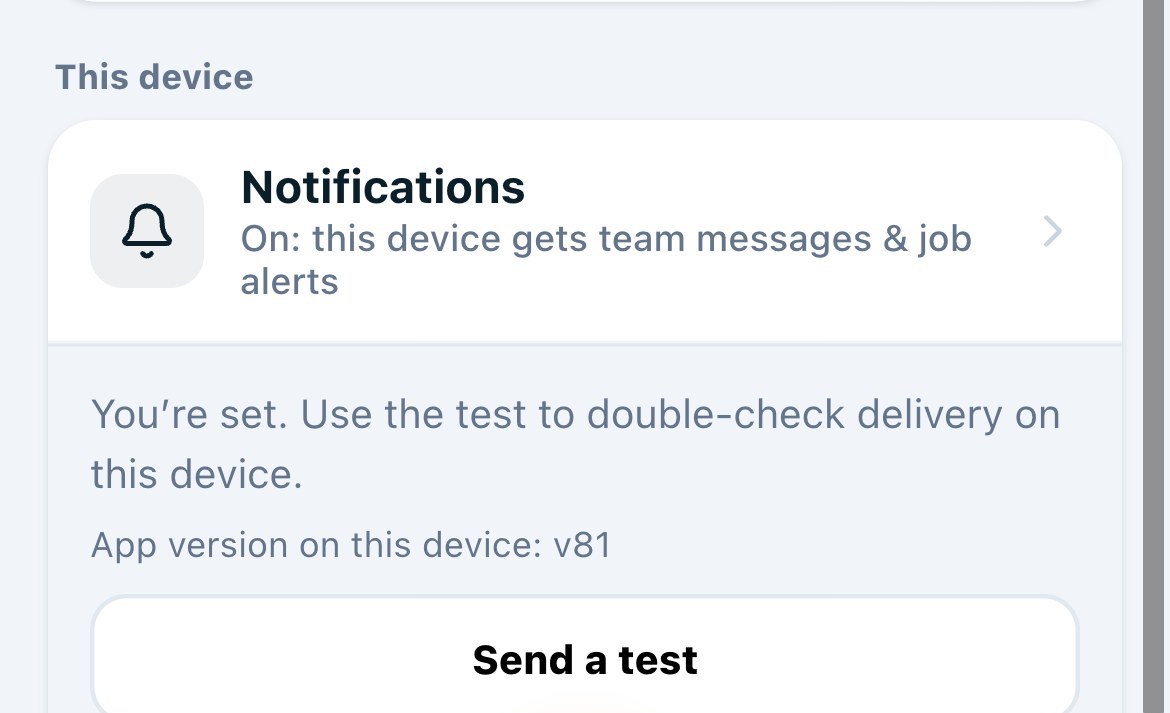
When you send “📣 Message the team” from Command Center (or the Team page), every tech with notifications on gets it on their lock screen within seconds, even with the app closed. Job assignments notify the tech automatically too, whatever the date; same-day jobs also go out by SMS. For that to work, each phone opts in once:
- Get every tech enrolled. Each phone taps the “🔔 Turn on notifications” card on their Home screen (or More → Notifications → Turn on). iPhones must run the installed app from the Home Screen icon (iOS 16.4 or newer); Android works either way. It’s part of a tech’s Day One.
- Turn yours on too. Team messages reach your phone the same way, including ones your admin sends.
- Verify per phone: More → Notifications → Send a test. It also shows whether a phone is blocked and how to fix it.
End to endHow the money flows: one install’s full journey
- Estimate sent (tech speaks it, sends with three options) → customer taps Better → that tap is the approval.
- Deposit collected at the yes: 50% by card on the spot if you’ve turned deposits on. The tech gets the heads-up.
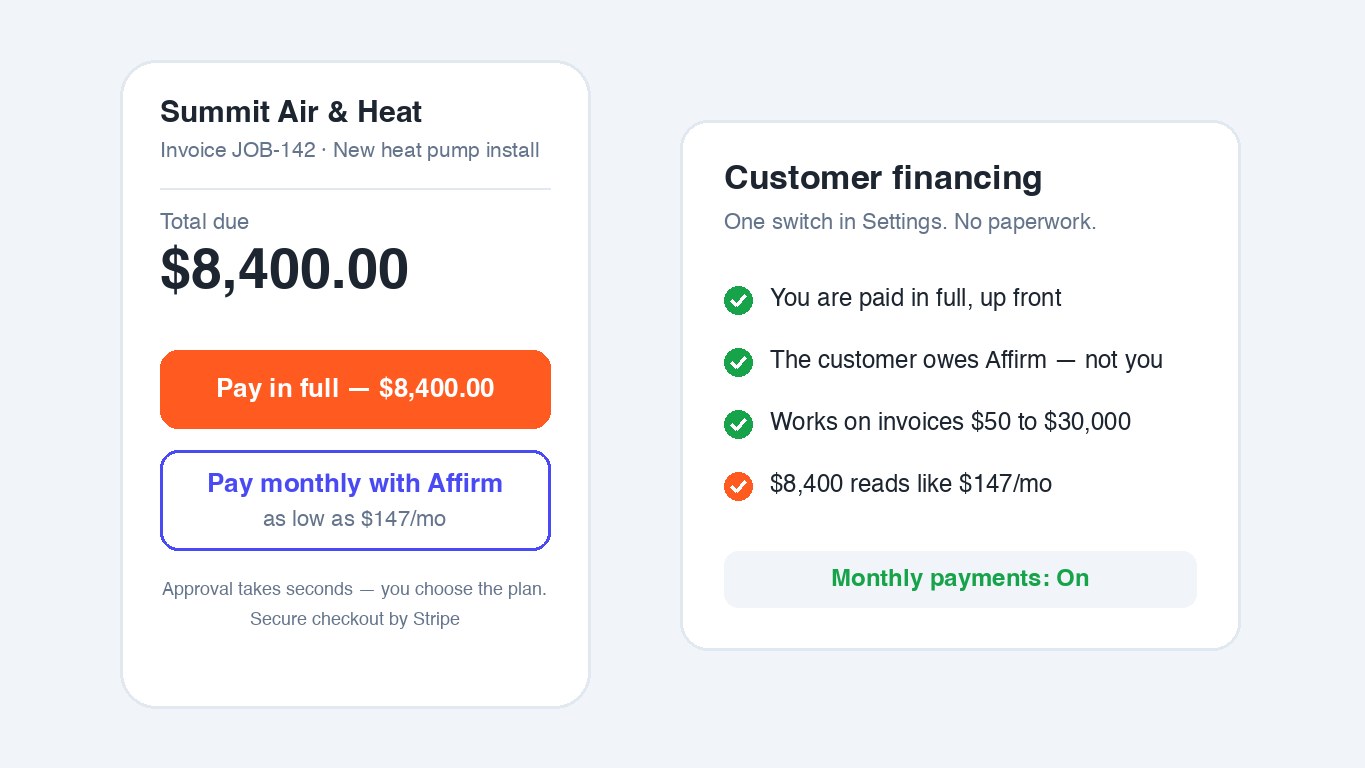
- Work done → convert. The approved estimate becomes an invoice that charges only the balance. The customer pays by card, or picks Affirm monthly payments if you’ve enabled financing. You’re paid in full either way; they owe Affirm, not you.
- Everything downstream is automatic. The tip they added notifies the tech. The parts leave the truck’s stock count. The commission hits the tech’s My Pay. QuickBooks gets its sales receipt. The review ask goes out at the right moment. You did: nothing.
- If they don’t pay: reminders nudge on your schedule; after your cutoff the late fee adds itself and old pay links are voided. Your morning report keeps score until it clears.
The two queuesApprovals: the two things that actually need you
Reimbursement receipts
When a tech buys parts with their own card and snaps the receipt as “my own money,” it appears in your Payroll tab as a pending reimbursement with the photo attached. Approve it and the amount rides into their next pay as its own line. Deny it with one tap if it’s not legit. Receipts on the company card skip this queue; they just count as job cost.
Timesheets
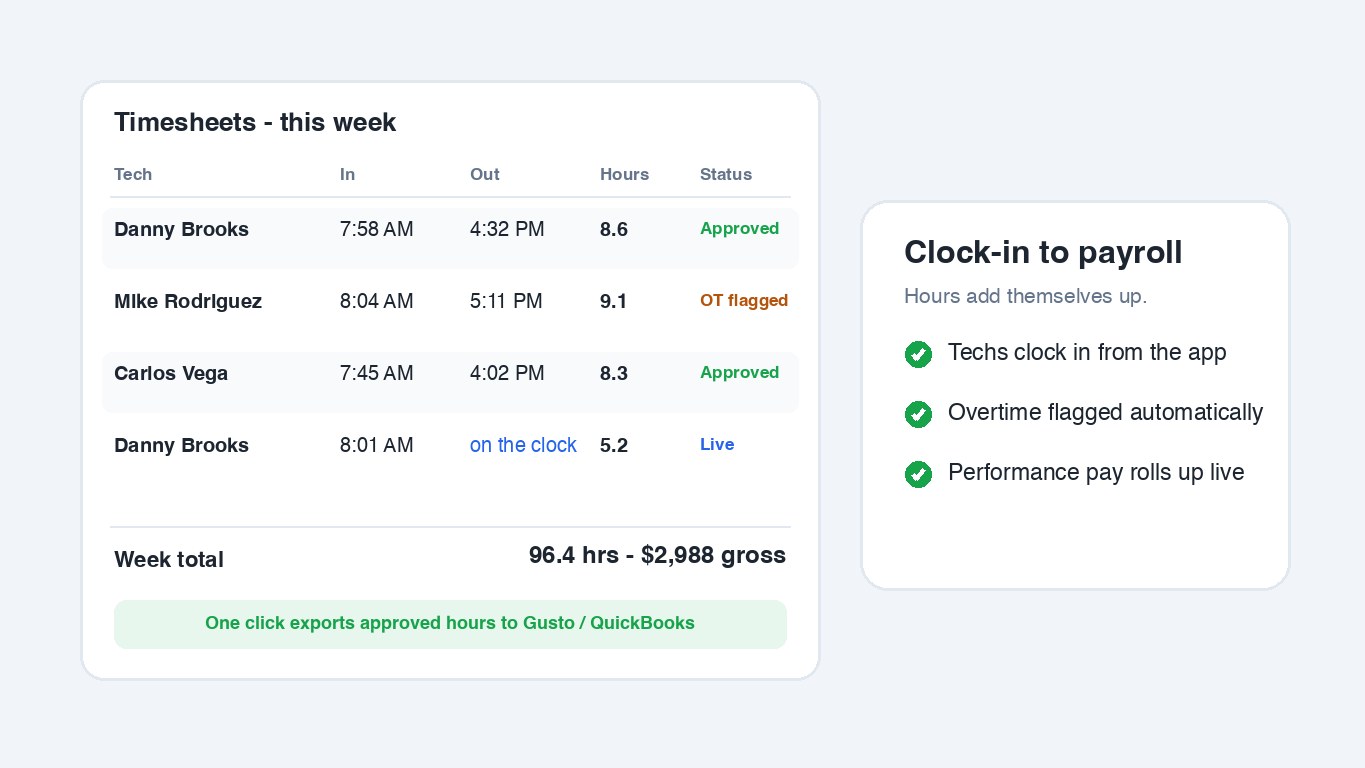
Techs clock in and out; you approve the week in the Timesheets tab. Overtime past 40 hours is flagged and paid at 1.5×. Approve-all takes one click when the week looks right; flag any entry with a note when it doesn’t.
Your quality bar, enforcedJob forms & checklists
The difference between “I’m pretty sure they checked the capacitor” and knowing they did is a checklist. Build one once and every matching visit enforces it.
- In the Command Center open Settings → Job Forms & Checklists → + New form. Name it, add items (checkboxes, yes/no questions, short answers like a temp reading, or note lines for reminders), and pick where it applies: every visit or just maintenance visits.
- Choose required and the tech can’t mark the visit Done until every item is answered. Leave it optional for softer guidance.
- Techs fill it on the booking card on their phone, saving progress as they go. You (and your admin) see every answer on the booking drawer in Dispatch; completed lists show the date.
The ten-minute FridayRunning payroll
- Approve timesheets (above). Hours are now locked in.
- Open Payroll. Every tech’s gross is computed for the period from their comp profile: hourly × approved hours, overtime at 1.5×, salary, % of sales or profit on jobs paid in the period, spiffs, tips, and approved reimbursements. Each is its own column, so “why is my check this number?” has a one-glance answer.
- Export. One click produces the CSV for Gusto or QuickBooks. You run the actual pay run in your payroll provider, with FieldForge’s numbers as the source of truth.
The night shiftThe automations, honestly explained
- Payment reminders: unpaid invoices nudge the customer daily or weekly until paid. Turn on day one.
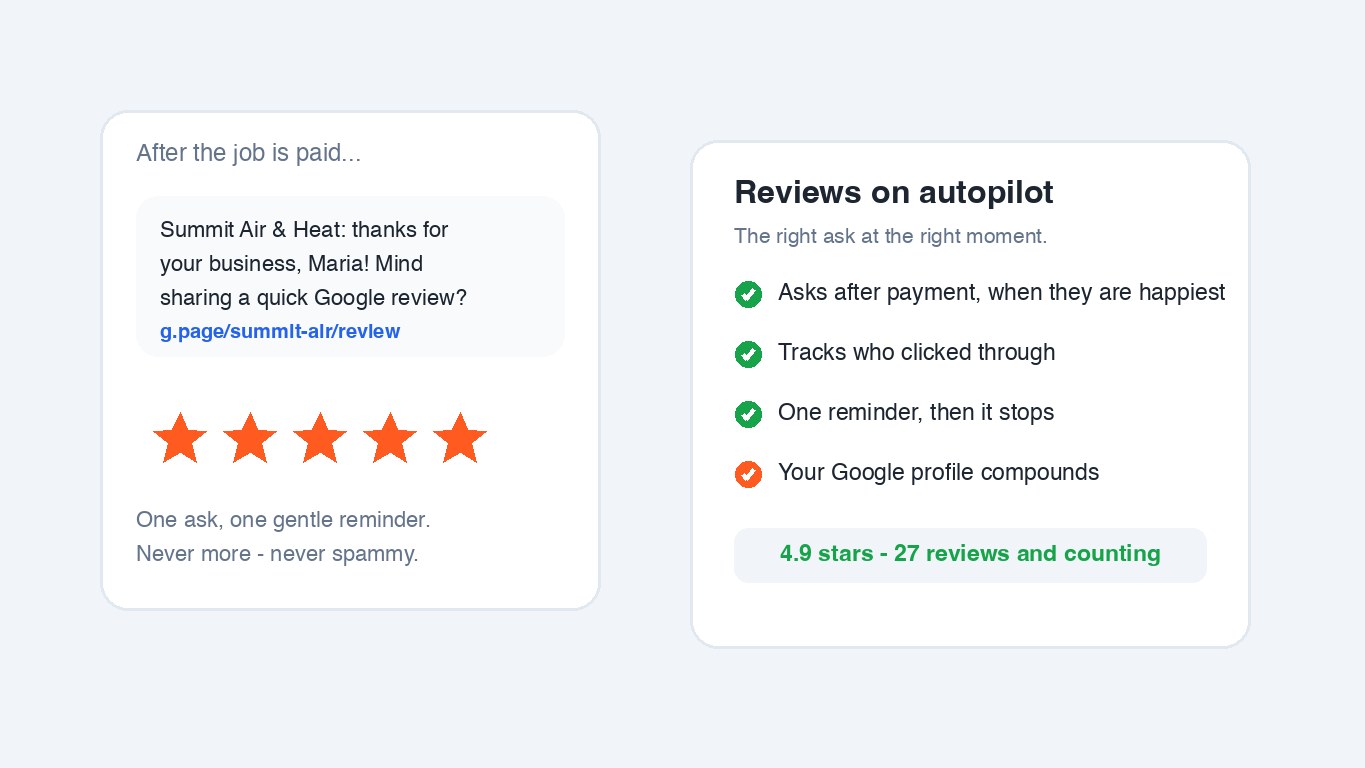
- Review requests: after payment, one ask with your Google link plus at most one reminder. Compounds forever. Day one.
- Estimate deposits: cash at the yes. Customers who’ve paid a deposit almost never ghost the install date.
- Estimate follow-ups: silent quotes get a polite nudge at day 2 and (optionally) day 7, in your words. Stops on approval.
- Appointment reminders: a day-before text with the time. No-shows drop.
- Late fees: one fee, once, after your cutoff, with the customer notified and old pay links voided. Check your state’s cap.
- Customer financing: Affirm at checkout on $50 to $30,000. Big tickets read as monthly payments.
- Memberships: active contracts auto-bill on their cycle, auto-schedule visits, and auto-discount member invoices. Steady revenue between seasons.
- Membership autopay: the member saves a card once (from their portal, or a link you text from the contract drawer) and every renewal charges itself, marks itself paid, and texts them a receipt. Declines fall back to a normal invoice and you’re told why. The card lives with Stripe; you never see the number.
- Customer-facing photos: the crew’s job photos show on estimates, invoices and the portal automatically (receipts never do). The before photo sells the repair; the after photo prevents the dispute. One switch under Settings › Invoice delivery turns it off.
- Truck stock: invoices deplete trucks; low stock alerts you; one click drafts the supply-house PO.
- Front Desk (add-on): the AI answers your line 24/7 and books real jobs into a schedule you confirm.
Fill the slow weeksEmail campaigns
When the board looks thin two weeks out, don’t wait for the phone. Customers › Email campaign in the Command Center sends a real, branded note to your customer base in about two minutes. Every recipient gets their first name, your company header, replies routed to your inbox, and an unsubscribe link added for you.
- Let AI write it (optional). Type the offer in one line, like “spring AC tune-up, $89 through May”, and tap Write it. The AI drafts a subject and a message you can edit. Prefer to write your own? Just type it in plain text.
- Pick who gets it. Everyone with an email, Members only (renewal reminders, member-first booking windows), Non-members only (the membership pitch), Lapsed (anyone with no job in six months, your win-back list), or any Tag you use. The count updates as you choose, so you always know how many you’re about to reach.
- Preview, then send. Tap Send me a preview to read it on your own phone first, then send for real.
- See what worked. The Recent campaigns list shows each send with opened and clicked counts, so you learn what your customers actually respond to.
Set it once, it sends itselfDrip sequences
A campaign is one email today. A drip sequence is a series that sends itself over days or months, so the follow-up you never get around to happens on its own. Build one in Customers › Drip sequences › + New sequence.
- Name it and choose how people enter: you enroll them yourself, or automatically when you add a new customer (the classic welcome series).
- Add the emails, spaced by days. Each step has a wait. Email 1 at 0 days goes the moment someone is enrolled, Email 2 at 7 days a week later, Email 3 at 180 days six months on. AI can write each step, same as a campaign.
- Save. An automatic sequence then starts on its own for every new customer. For a manual one, tap Enroll… and pick an audience (everyone, members, lapsed, a tag), exactly like a campaign.
Three that earn their keep:
New-customer welcome (automatic): Day 0 “Thanks, here’s what to expect,” Day 7 “Book your first tune-up,” Day 90 “How did we do? Leave a review.”
Win-back (manual, enroll your Lapsed list): Day 0 “We miss you, here’s $25 off,” Day 14 “Last call on that offer.”
Yearly tune-up (automatic): Day 0 welcome, Day 180 “Halfway to your annual service,” Day 350 “Time to book before the season rush.”
Respond before anyone elseThumbtack lead import
If you buy leads on Thumbtack, stop checking their app for new ones. Settings › Thumbtack Leads gives you a URL that pipes every new lead straight into your Dispatch board, no copy-paste.
- Open Settings › Thumbtack Leads and tap Copy on the URL shown.
- In your own Thumbtack account: profile photo › Integrations › Manage webhooks › Create webhook. Paste the URL, leave Authorization as None, check Lead details only, and save.
- Every new lead now shows up in Dispatch as a request to confirm, name, phone, job details and proposed time already filled in, and you get texted the moment it arrives.
Same board, Angi tooAngi lead import
Buy leads on Angi as well? They can flow into the same Dispatch board. The one difference from Thumbtack: Angi connects it on their end, so there’s a one-time email step instead of instant paste-and-go.
- Open Settings › Angi Leads and tap Copy on the URL shown.
- Email that URL together with your Angi ID to Angi’s integrations team at crmintegrations@angi.com, and ask them to send your leads to it. (This is Angi’s own setup; it takes them a little time to switch on.)
- Once it’s live, every Angi lead lands in Dispatch as a request to confirm, with the customer’s name, phone, email and job already filled in, and you get texted right away.
Your shop, on the internetYour free website
No website? You have one now. FieldForge builds a one-page site from what it already knows about your business: your services, your reviews link, your job photos, and a Request Service button wired straight to your Dispatch board.
- Open Settings › My Website. Your web address is suggested from your company name; change it if you like, then Save.
- Tap Preview to see it. It updates itself as your price book, reviews link and photos change.
- Tap Publish website. Put the address on your truck, your cards and your Facebook page.
Win the big jobsEstimate templates
A $6,000 replacement quoted as a bare parts list loses to the competitor who sent a real proposal. Build the proposal once, reuse it forever: your intro in your own words, the scope of work step by step, photos of the equipment you install, and your terms. Trio and up.
- Open Console › Settings › Estimate Templates and tap + New template. Make one per big job you quote: system replacement, water heater, panel upgrade.
- Write the intro like you talk, list the scope one line per step, add 3–8 photos and your terms. Need more room? Add extra sections (headings, paragraphs, bullets, image rows) and reuse images from Settings › Media Library. Prefer one clean number? Flip Line items to hide the itemized table. Save.
- Add your standard line items, labor hours and good/better/best options to the template and it becomes a one-tap estimate: no voice note needed.
- When a tech records an estimate, a Proposal template picker appears on the draft (phone and Console). Pick one, tap Apply, then send as usual.
- Or skip the mic: + New estimate (on the Jobs tab, the record screen, or Console) › pick the template › pick the customer › review and send. Prices, labor at your rate, tax and the proposal content are all filled in.
- The customer’s quote page now opens with your intro, the scope, the photos and terms around the price, with Approve one tap away.
Stay healthyThe rhythm that keeps it healthy
- Daily (2 min): morning report → Overview → confirm bookings → clear any approval badges.
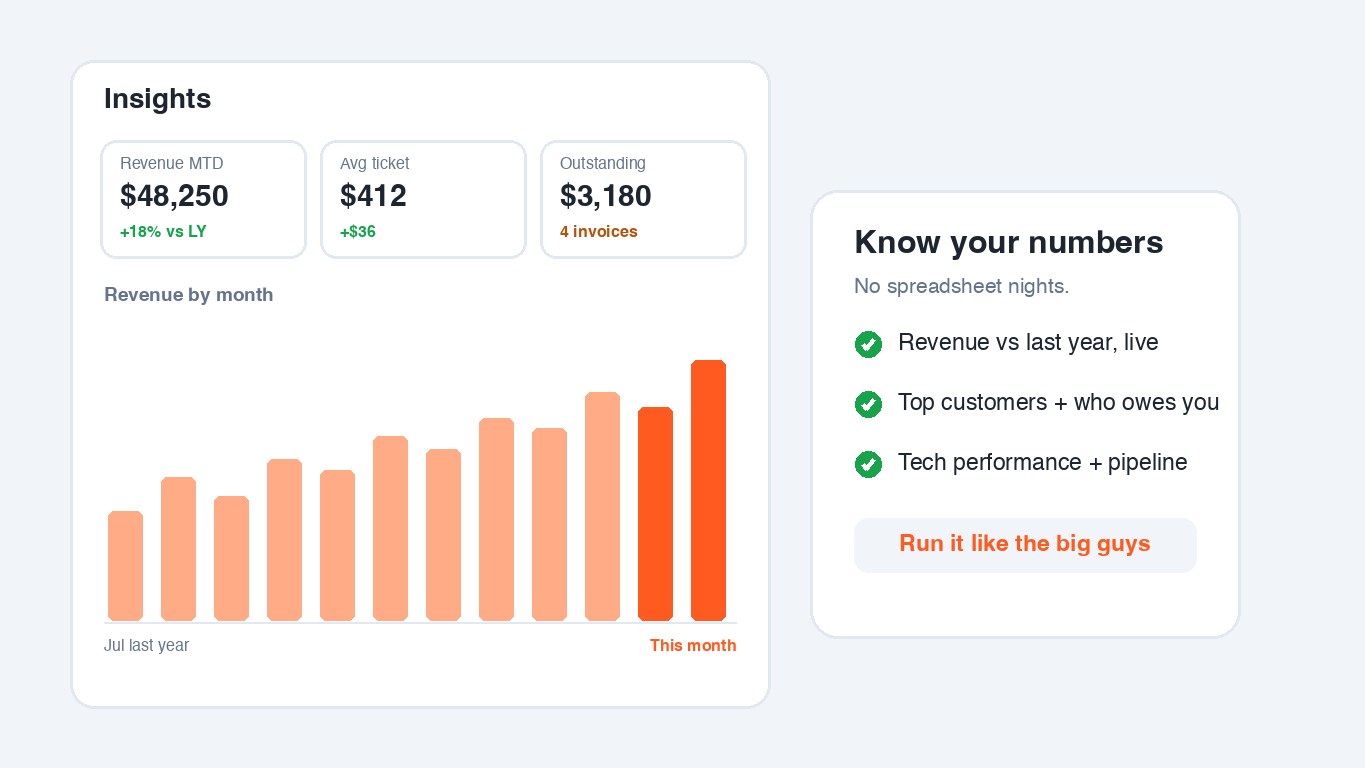
- Friday (10 min): timesheets → Payroll → export. Glance at Insights: revenue vs last year, who owes you.
- Monthly (20 min): a price book pass (costs drift, your margins shouldn’t), inventory pars vs reality, your automations’ stats (reviews asked and clicked, follow-ups converted), and the Audit Log if anything ever looks odd. Every action by every person is in there, permanently.